Uh no! It’s been weeks since my last post and I didn’t have time to update this blog. So here I am being online again bringing you another tutorial covering -still- about Webuzo free control panel. You can browse all articles about Webuzo here.
By reading this guide I assume you have Webuzo CP installed, up and running already. If you don’t, please refer to my previous articles:
About WordPress: It is a well-known blogging platform as well as a CMS used by millions bloggers around the world. It has big and most active communities backed up with thousands of developers. WordPress is basically included and available within Webuzo package. But unfortunately, you can’t automatically install WordPress using Webuzo’s script installer unless you have Paid license (see pricing). However if your Webuzo install is really a fresh installation, then you can simply use Premium Trial License (free with full features for one month). Otherwise, or after the Premium one month trial license has ended, so you have to install WordPress manually and that this article is about.
Got it? Now let’s start with the tutorial..
p.s:
– always replace x.x.x.x with your server’s IP address.
– click on image to view the larger version.
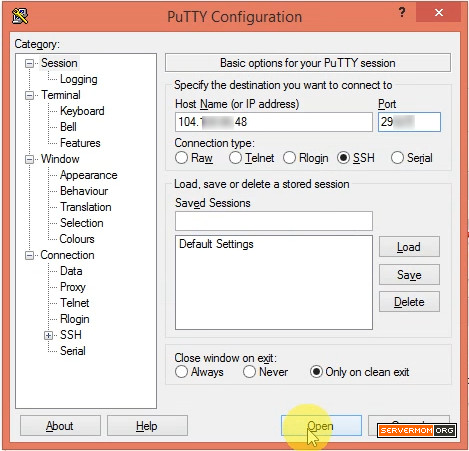
Step 1 – Open up your favorite web browser and login to Webuzo Enduser Panel at:
http://x.x.x.x:2002/

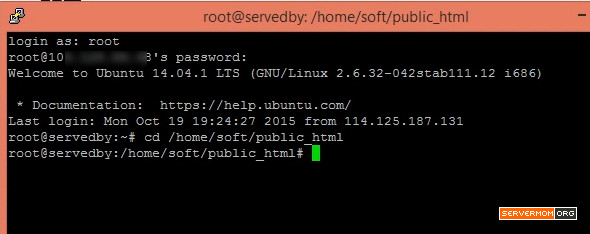
Step 2 – Leave your browser for a while and open up Putty then login to your server:
Step 3 – Once logged in, go to:
/home/webuzousername/public-html
change webuzousername with the username you use to login to Webuzo cp which in my example is soft.
cd /home/webuzousername/public_html
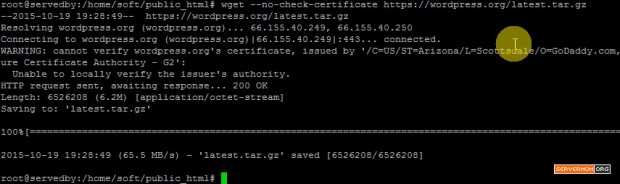
Step 4 – Next, download WordPress package using wget:
wget --no-check-certificate https://wordpress.org/latest.tar.gz
Step 5 – Extract the newly downloaded WP package with this command:
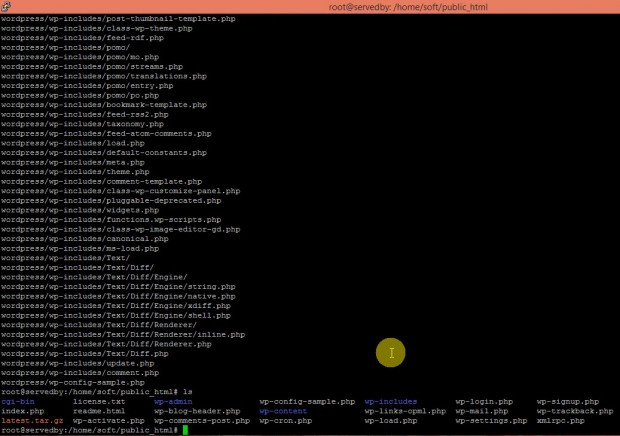
tar --strip-components=1 -zxvf latest.tar.gz
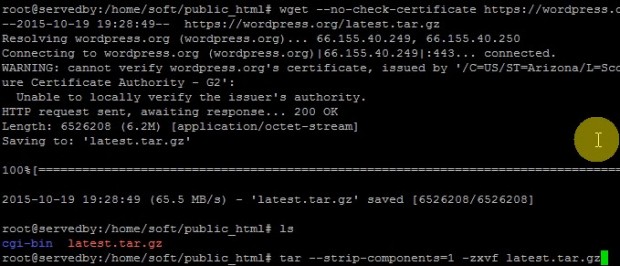
Once done, use ls command to check the extracted files and folders. It should look like this:
Do not also forget to set proper ownership of that directory:
## command:
## chown -R username:username /home/username/public_html
## example:
chown -R soft:soft /home/soft/public_html
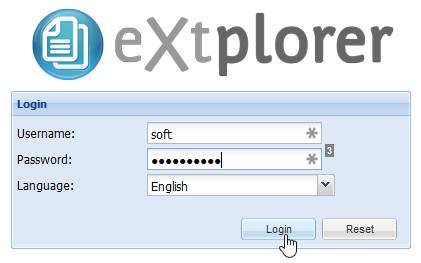
Step 6 – Go back to Web Browser and open up Webuzo’s File Manager

then login to File Manager using the same Username and Password used to login to Webuzo CP.
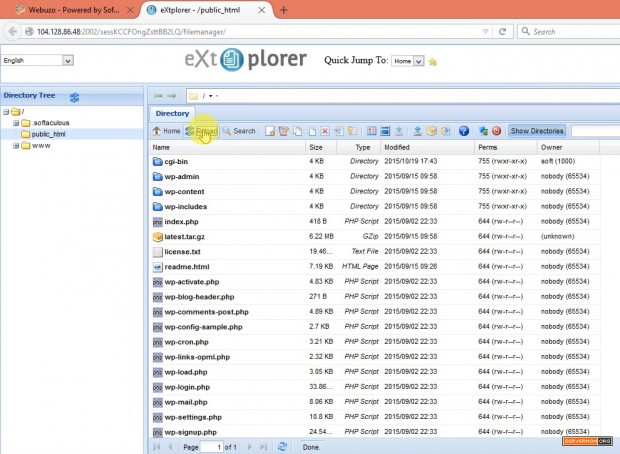
You will see something like this:
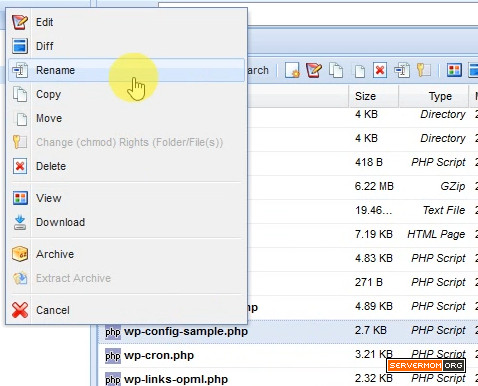
Step 7 – Next, rightclick on wp-config-sample.php and rename it to wp-config.php
Step 8 – Now you can rightclick on the wp-config.php and choose Edit.
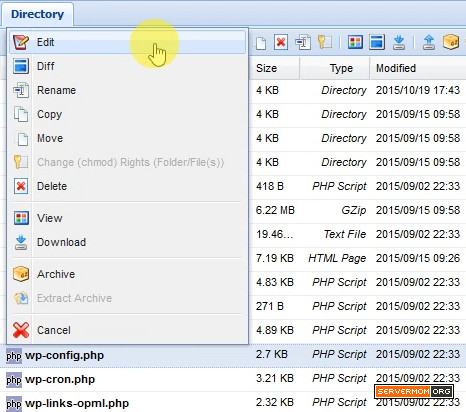
The File Editor window will appear. You can then edit any text just like in Notepad.
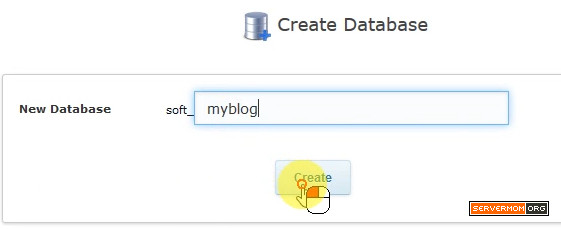
Step 9 – Go back to Webuzo main Control Panel page and click the Add Database icon:
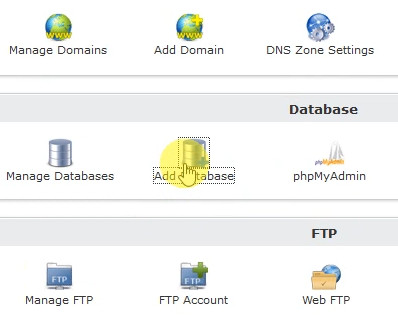
create new database. Give it a proper name you can easily remember.
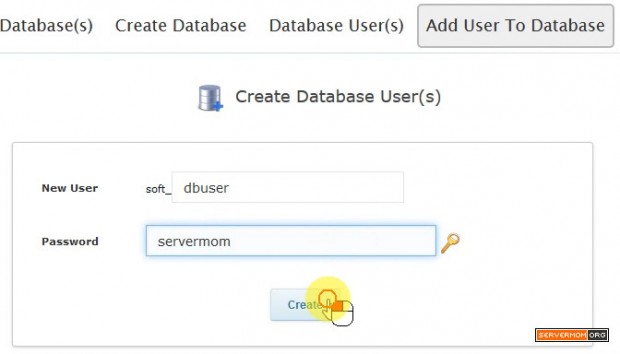
Step 10 – Go to Add User To Database tab, create new database user and password. Make sure you remember / noted down the password.
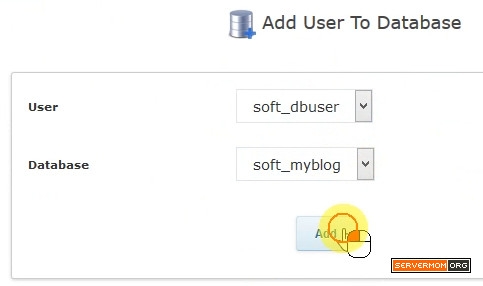
Step 11 – Once created, scroll down that page a bit and add the newly created database user to your database.
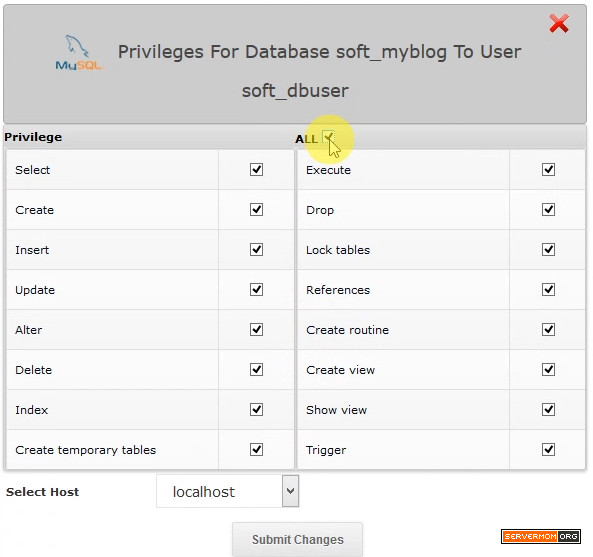
Check mark the All option in the Privileges setting followed by clicking the Submit Changes button.
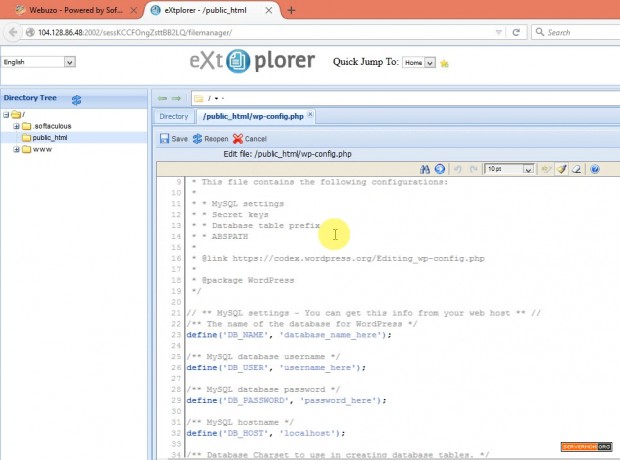
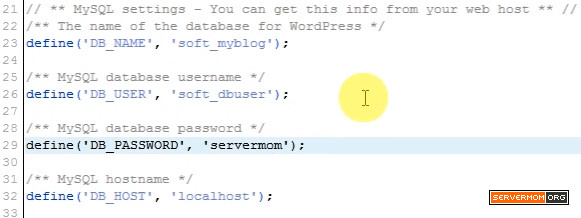
Step 12 – Now go back to File Manager window and replace MySQL settings for your WordPress installation. Use the ones you’ve created (Database name, database username and password).
Step 13 – Next, scrolldown the page a little bit till you’ve found Authentication Unique Keys and Slat section which usually looks like this:
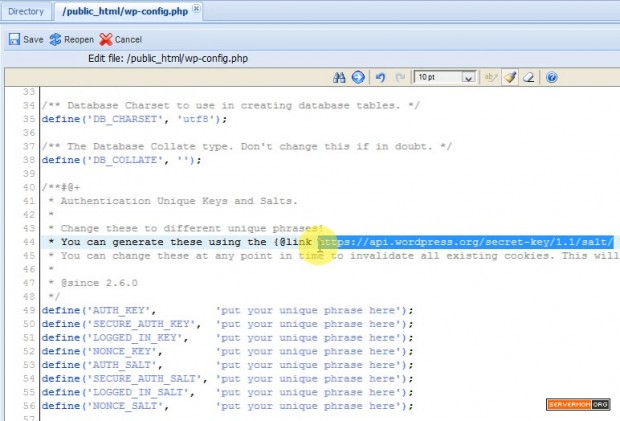
Go to https://api.wordpress.org/secret-key/1.1/salt/
copy all the text you see there, copy it and use it to replace the one in File Editor. It should look like this:
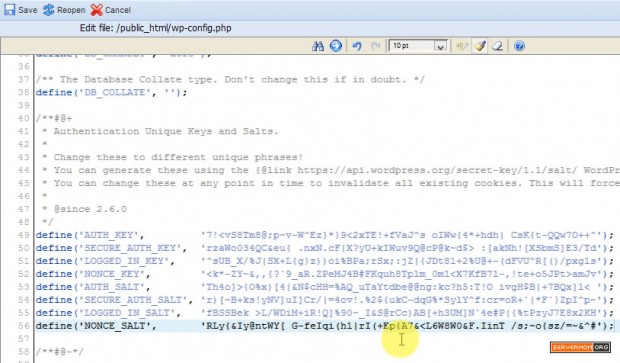
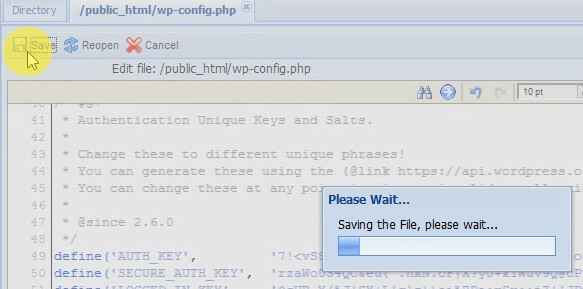
Step 14 – Once done, click the Save button in the top left corner so all changes can be saved.
Step 15 – Next, simply open up another web browser tab and proceed with usual WordPress installation procedure:

That’s all. I hope you enjoy it!
Do not forget to subscribe or follow me on twitter to get faster update. Stay tuned for other Webuzo tutorials which is next.
This post Install WordPress Manually On Free Webuzo CP is part of ServerMom.