So you’ve installed Webuzo on your VPS and what’s next? Follow few steps below which are most common / basic setup after installing Webuzo free control panel on your server before you upload your website’s files and database into it.
Before we continue, sure thing you have to firstly installed Webuzo on your Dedicated, Virtual or Cloud server. I posted a complete step by step guide on how to install Webuzo on Ubuntu server (It’s 15.05 but should work on any latest Ubuntu version). As usual, I also included useful screenshot pics at every step so you won’t hesitate following each of every step of the tutorial.
Let’s start…
p.s:
– always replace x.x.x.x with your server’s IP address.
– click on image to view the larger version.
Step 1 – Open up your favorite web browser and login to Webuzo Enduser Panel at:
http://x.x.x.x:2002/
Image may be NSFW.
Clik here to view.
Step 2 – Once logged in, click on the Manage domain section. What we’ll do here is just to review all available domains already added into Webuzo system and where’s its web directory is located at. Remember that you can always see the list of all domain (main, addon and/or parked domains) via that menu.
Image may be NSFW.
Clik here to view.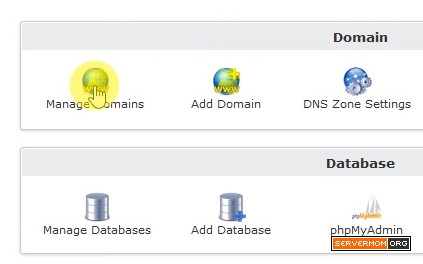
as you may can see below, there is only one domain (which is the main domain) in my Webuzo system and its web directory path is located at /home/soft/public_html which “soft” is my admin username in Webuzo. So if your username is “sawi” then it should be /home/sawi/public_html.
Image may be NSFW.
Clik here to view.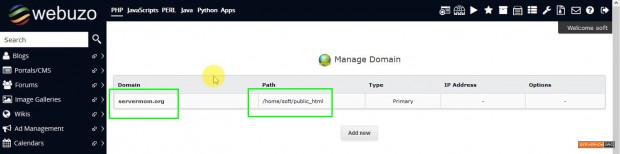
Step 3 – Now click on Apps >> Web Servers. Here we’re gonna install latest stable version of Apache 2 (v2.4.16 a.t.m). FYI that Webuzo brings few ready-to-use web servers including Nginx, Apache, Apache 2, Node.js, and Lighttpd. As by default Apache is installed and per my test it’s not working properly, so I’ll suggest you to replace that with Apache 2 (if you wish to use Apache, otherwise I’ll explain about LNMP/Nginx in separate article).
Image may be NSFW.
Clik here to view.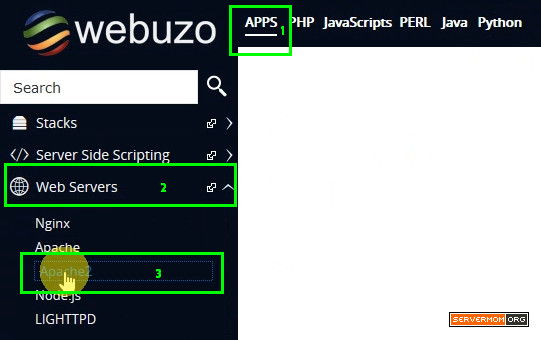
Tick (check mark) the Set Default option then click the Install button.
Image may be NSFW.
Clik here to view.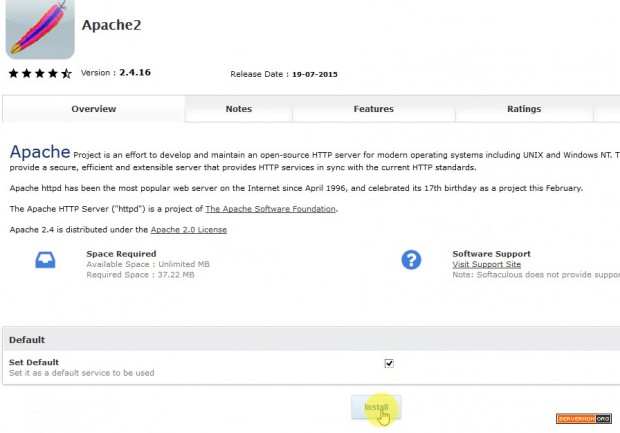
Once done you’ll see this..
Image may be NSFW.
Clik here to view.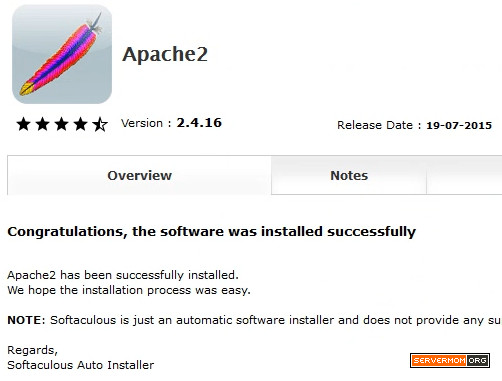
Step 4 – Next, click the Server Side Scripting >> PHP5.3 and make sure this is a Remove button (but don’t click it). The existence of Remove button indicates that PHP5.3 is already installed.
Image may be NSFW.
Clik here to view.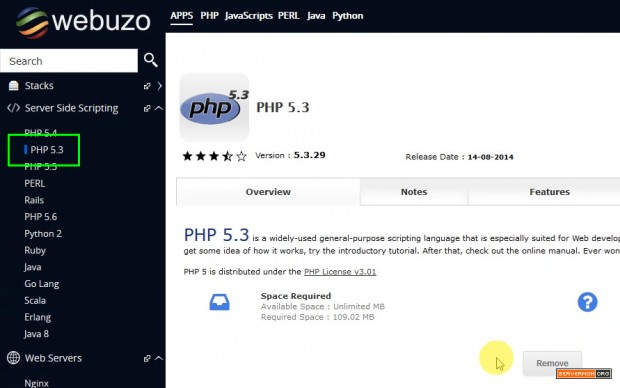
Step 5 – Go back to the Frontend User Panel then click the Services icon (in Advanced Settings section). Make sure all services are running. If not, you may need to start it. In my example BIND did not run by default so I have to start it.
Image may be NSFW.
Clik here to view.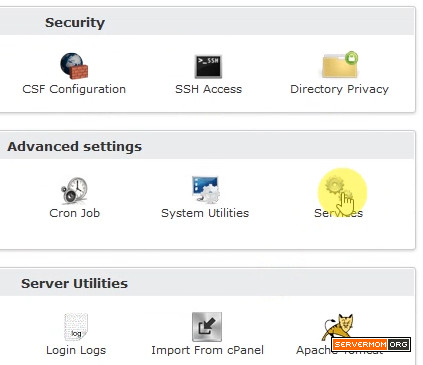
example of mine:
Image may be NSFW.
Clik here to view.
Step 6 – Go back to the frontend user panel home page (click the top left Webuzo logo) and open File Manager under Server Utilities section.
Image may be NSFW.
Clik here to view.
Step 7 – A new browser tab will open and you’ll see a login page. Simply use the same username and password you use it to login to Webuzo.
Image may be NSFW.
Clik here to view.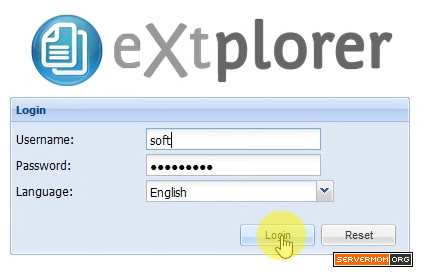
Step 8 – Once you’re in, go to public_html folder (doubleclick it).
Image may be NSFW.
Clik here to view.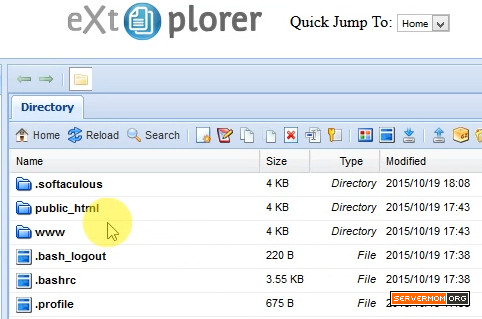
Step 9 – Then click on the Create New File icon. This we’ll create a test index.html file
Image may be NSFW.
Clik here to view.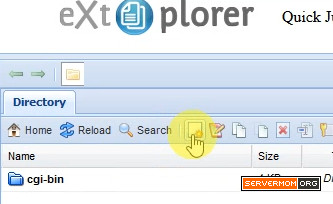
name that file index.html
Image may be NSFW.
Clik here to view.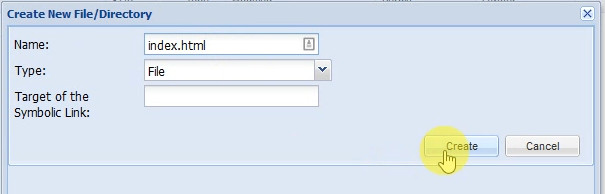
Step 10 – Next, click that newly created file and edit it (use the Edit icon)
Image may be NSFW.
Clik here to view.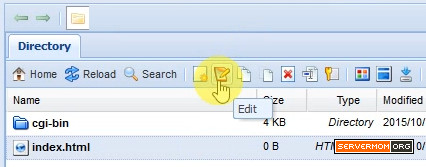
now put some dummy text / message there just for test purpose. Do not forget to hit the Save button.
Image may be NSFW.
Clik here to view.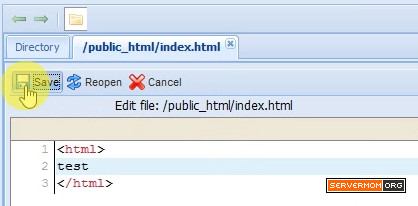
Step 11 – Open up a new browser tab and try accessing your website. Make sure the dummy text you’ve put shows up there.
Image may be NSFW.
Clik here to view.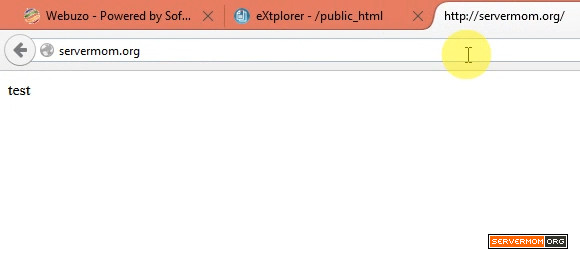
Otherwise, try restarting your webserver / Apache 2.
That’s it for now. In the next article: how to install WordPress on Webuzo control panel free version.
Stay tuned and do not forget to follow me on Twitter or subscribe using your email to get faster update.
This post Basic Webuzo Setup (Free Control Panel) is part of ServerMom.